Don't have an account?
Register NowYou have to add to cart at least 5 bottles or any program to make checkout.
- BlogHow to Use a Dry Herb Vaporizer: A Guide
How to Use a Dry Herb Vaporizer: A Guide
Published: September 18th, 2020
Categories:
How To
We live in a world where technological advancements abound. These days, even cannabis consumption is a lot more complex than it was during the times of Reefer Madness, or even just a few decades ago when the bong, pipe, and spliff reigned supreme.
We’re not complaining, though. In fact, we’re thankful for developments like the vaporizer for allowing us to toke up absolutely anywhere and go undetected. We no longer need to step outside into the cold and take a few puffs, because we can do it right inside the house!
How to Use a Dry Herb Vaporizer
In honour of this great gadget, we’ll be taking a deeper dive into the dry herb vaporizer. But we won’t nerd out on its technology too much. Instead, this will be more of a beginner’s guide on what you’ll need to assemble for your vaporizer starter kit, how to use the device, some advanced techniques, and cleaning methods. We’ll even give you some tips on what to do with that bud you’ve already vaped on. Do you throw it out? Or do you put it back in the stash drawer?
What You Need to Start Vaping

First, let’s get into your starter kit. Before you can start vaping, there’s a list of things you need. If you’re a veteran smoker, you may already have all of this. Nonetheless, it’s good to have this checklist around to refer to:
-
A dry herb vaporizer: Portable or desktop? Conduction or convection? These are questions you’ll want to ask yourself before purchasing a dry herb vaporizer. And, as with any important purchases you’ll make in life, do your due diligence first.
-
Top-quality herb: This is an obvious one. You won’t be able to do some dry herb vaping without the main ingredient, right? It’s easier to go with your favourites, but we suggest experimenting a bit with some fun combos. Durban Poison x Granddaddy Purple, anyone?
-
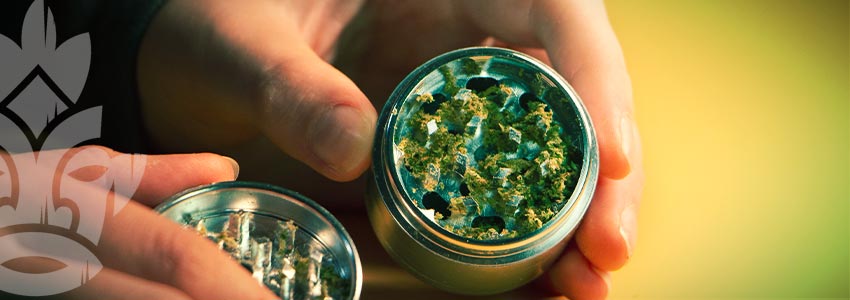
A trusty grinder: Whether you prefer wood or steel is up to you, but you’ll need one to render your cannabis to the ideal grind. As long as it gets the job done, you’re good to go.
-
Cleaning tools: Some people prefer having those small brushes around. Others are good with toothpicks or a straightened-out paper clip. Whichever one you go with, be sure that it won’t damage your device in any way.
-
Disinfectants: You can’t be too safe. Always have a bottle of isopropyl alcohol and some cotton swabs with you for sanitising purposes.
How to Pack a Vaporizer

Using a dry herb vaporizer is a bit different from using a pipe or a bong. First of all, grinding herbs with your hands just won’t cut it. Most devices won’t function properly unless buds are ground to a medium or fine consistency.
But, let’s cut to the chase. Here’s what you’ll do:
-
Grind your buds to the required consistency for your device.
-
Take a small amount and pack it into the herb chamber using your finger or a small tool. Be sure to flatten the pile to allow room for more herb, but don’t overcrowd your vaporizer. Leave some space for air to flow.
Setting Up a Dry Herb Vaporizer

But wait, before you completely fly off to la-la land just yet, here’s an important thing to remember:
Whether your device loads at the top or bottom matters. Bottom loaders offer a smoother vapor because the longer air path allows it a little more time to cool. Top loaders, on the other hand, are more flavourful because of the shorter air path. They also give off more vapor, which looks a lot cooler, depending on where you are, of course. There isn’t much to set up with a bottom loader because it’s pretty straightforward. But you can do more with top loaders, like adding in a glass tube mouthpiece for a cleaner flavour.
With all of this information in mind, the most important thing to remember about getting started with your vaporizer is heating it up first. Most units have light indicators to let you know if it’s ready to go, while other, fancier devices have temperature gauges on them. But maybe you can establish a motto for yourself, something like “heat up before toking up”. Worth a try, but you can probably do better. Make sure your dry herb vaporizer is fully charged before using, or plug it in if it’s a desktop model or has pass-through charging.
How to Inhale From a Vaporizer

Now, you may deem this to be a no-brainer. But for some people, using a vaporizer takes a little getting used to. One of the things that can throw people off at times is how much cooler the vapor is compared to smoke.
Generally, you’ll have to wait about 30 to 45 seconds for a vaporizer to heat up for puffing. Portable devices take about a minute—still not that long of a wait. When it reaches its optimal temperature, you can begin with some light, gentle puffs. Slowly drag it in until it fills your lungs. After this, exhale right away (no need to hold) and let that white cloud of vapor envelop the air around you.
Keep in mind: Most vaporizers cut off after a few minutes of use, both for safety and energy-saving purposes. Once it does, just give it a few seconds of rest before turning it back on.
Advanced Technique: Using a Vaporizer With a Water Bong

Looking at the technology, you can say that dry herb vaporizers and water bongs are close cousins. But only a few handfuls have thought of combining both instruments to create an entirely unique experience. In this case, the vaporizer serves as the feeder tool, while the bong will be your mouthpiece. To start off, load up your vaporizer with ground-up herb.
Now, some vaporizer brands include a bong attachment. It’s a plastic tube similar to a mouthpiece that you insert onto the chamber of your device. On the other end, you’ll need a female adapter attached to the bowl of your bong. Once you’ve got that all set up, attach the vaporizer’s male end onto the female adapter of your bong. Turn your vape on and begin inhaling from the bong’s mouthpiece. The end result? Ultra-smooth vapor you’ll want to experience this way every single time. It may take a little more effort, but this right here is a game-changer.
What Do You Do With Already Vaped Bud (AVB)?

This is the next big question people ask about using dry herb vaporizers because, frankly, people aren’t too keen on letting high-quality buds go to waste. And indeed, they are still very much usable. For one, you can use your AVB to make edibles. You even get to skip the tedious decarboxylation process, so it’s all a matter of throwing the bud into your existing ingredient pile. And, if you’re the type who drinks their cannabis, AVB also goes well with your coffee or tea. Bottom line, you can still put your vaped bud to good use. So don’t throw it out just yet.
How to Clean a Dry Herb Vaporizer

Much like your other pieces of equipment, dry herb vaporizers need some regular cleaning. Here are some things to keep in mind:
-
Keep your device unplugged and cooled down before proceeding with the process.
-
To clean your mouthpiece, soak it in some isopropyl alcohol or a soap and water mixture for two to five minutes. Be sure to rinse, and let dry completely afterward.
-
For any ground-up pieces left in the vaporizer’s chamber, you’ll want to use a brush for better efficiency. Finish it up using a Q-tip dampened with some isopropyl alcohol.
-
Use the same Q-tip-alcohol combo to clean the vapor path. This should ensure you are inhaling pure, uncontaminated vapor.
-
For best results, you can also do a burn-off by letting the machine run for up to four heating cycles with the chamber empty. This helps remove any leftover residue.
Especially if you spent a small fortune on your vaporizer, you’ll want it taken care of. So don’t skimp on the cleaning process, and be sure to do it as regularly as possible.


