Don't have an account?
Register NowYou have to add to cart at least 5 bottles or any program to make checkout.
- BlogA Comprehensive Guide To Growing Organic Cannabis Indoors And Out
A Comprehensive Guide To Growing Organic Cannabis Indoors And Out
Published: August 23rd, 2019
Categories:
Cannabis Cultivation
GROWING ORGANICALLY
Growing cannabis organically is more about the soil than the plant itself. Plants respond with vigour when growing conditions are ideal. Light, either from the sun or artificial sources, water, and nutrients are the most basic requirements for healthy plant growth.
Non-organic cannabis growing refers to methods that rely on factory produced fertilisers that are added to the soil. These may have their origins in the petrochemical industry and other environmentally unsound sources. Organic growing, on the other hand, relies on the use of naturally produced nutrients from compost, guano and other manures, kelp and seaweed, worm castings, various meals, and rock dusts.
Although there is still some debate, the consensus certainly leans towards organically grown cannabis being of a higher quality. Not only during growth and flowering, as organically grown weed is more robust and less susceptible to pathogens and bugs, but also in the aromatic, resinous, and potent end product.
Using good-quality soil from the start—one that is regularly amended with organic materials during each phase of growth—provides all the macro and micronutrients, minerals, enzymes, and amino acids for the most robust plant performance. Well maintained organic soil also increases the natural immunity of cannabis plants, providing holistic protection against root pathogens and attacks from soil and arboreal parasites, without ever having to resort to man-made poisons.
DON’T DIG IT, YOU DIG?
Growing in organic soil is considered “no-till”, where the medium is left alone except for the administration of amendments. Leaving the soil undisturbed lets colonies of beneficial microorganisms form a rich and plant-healthy web throughout the soil mass. Turning or digging soil disrupts these colonies, which will set you back to day one. No-till gardening increases soil health and efficiency over time so plants in the same spot or pot will get better and better each year.
MAKING YOUR OWN COMPOST

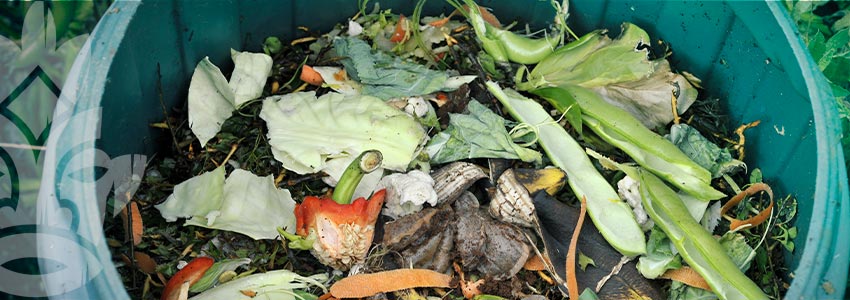
Compost is the basis for any high-quality organic soil. Composting takes organic waste material and converts it over a relatively short time into a carbon and nitrogen-rich medium. Making your own compost is a great way to achieve a fundamental base for organic growing. Once amended with other cannabis-friendly material, you will have the ultimate weed-growing soil—one containing a healthy mix of nutrients and other beneficial amendments to support a plant throughout its entire life cycle.
Compost is a balance of nitrogen (wet or green) and carbon (dry or brown) organic waste that is left to decompose. The ideal ratio of nitrogen to carbon is 1:30.
Sources of nitrogen or green waste:
• Vegetable, salad, and fruit scraps
• Coffee grounds
• Eggshells—preferably pulverised into a powder
• Nut shells—preferably pulverised into a powder
• Feathers
• Hair and fur
• Tea and tea bags—remove strings and staples
• Stale or mouldy bread products
• Animal manures—fowl, bird, bat, and quadruped (preferably not horse, and definitely no dog or cat leavings)
Sources of carbon or dry waste:
• Straw of any kind
• Dry leaves
• Dry alfalfa or clover
• Woody plant trimmings—ideally shredded or mulched
• Shredded paper products—no glossy paper or corrugated cardboard
• Sawdust—in small amounts; pine isn’t recommended
A compost pile requires air as the beneficial bacteria and other microorganisms that do all the breaking down are aerobic. Not enough air will encourage anaerobic activity and reduce the nutrient and mineral content of the finished compost. It will also smell really bad.
You can make a pile on a tarp in the corner of your garden, buy a commercial composter from a hardware shop, or make a three-sided enclosure. If making an enclosure, ensure plenty of air can get in; concrete blocks or bricks on the sides make for a permeable wall, or a simple cylinder made from chicken wire will do the job.
To determine the status of your compost, a good rule of thumb is to see how wet the mix is. This can vary from season to season with temperature, but if the compost has maggots, it is too wet and more dry material needs to be added. There may be some larger larvae like sawfly larvae, but these are okay as they will die and decompose when the compost is turned, adding chitin to the mix.
Similarly, if the compost smells foul, like it is rotting, it is also too wet and needs dry material added. Turn the mixture at least once per week, preferably every three days, to make sure the whole pile is aerated. If you see a white fuzz appear, then all is well; Actinomycetes are actually beneficial bacteria and a sign your compost is healthy.
Composts do not need to be made in a single large batch. They can be added to slowly over time as material becomes available. Make friends with your local restaurants and coffee houses to source larger quantities of raw materials if you want to go big. Or simply build things up from family and friends’ domestic cooking waste.
HOW TO MAKE A COMPOST PILE

1. Put a 10cm layer of carbon or dry material as a starter layer at the bottom of the pile. Unexpanded coco coir works very well also.
2. Add a 10cm layer of nitrogen or wet material. If you have composted before, add some already digested compost to this layer as an activator for microorganisms. If this is your first compost, add some alfalfa meal, fermented seaweed, or blood and bone. This will attract the beneficial microorganisms that get the digestion process started.
3. Repeat the layer by layer steps until you have a cubic metre of material all piled up. A pile this size will generate enough heat to sterilise any nasties present.
4. Turn the compost at least once per week, and ideally every three days. Turning too often harms the beneficial bacteria and releases vital heat from the pile.
5. Compost will take between 3–6 months to break down completely, depending on the weather. Less time is needed in warm months, and more in colder months. When it’s finished, it will be light, fluffy, and smell rich, sweet, and earthy. Good-quality compost will compress into a ball if squeezed, and then break apart easily when agitated.
If you are adding to a compost pile slowly over time from domestic waste, similar rules apply. Every time you visit the pile to dump out some wet waste, add a handful of dry material. Then, every three days, turn the pile over to ensure good oxygenation.
6. Once your selected container is full, start a new one, but still turn the original every three days. After 3–6 months, it will be ready for use and the cycle can be repeated and go on forever. You will also be sequestering carbon.
If you want to upcycle, the barrel from an old washing machine holds around 70 litres and is perforated all around for air penetration. Old fridges flipped on their backs can hold over 100 litres and are insulated against the cold.
WORMS

If you want to take things a step further, once your compost pile is ready to go, add some worms and let them go to work for at least three months. The final product will be rich in bioavailable enzymes, minerals, nutrients, and humic acid, and will be more than 50% humus. Worms also remove any toxins and harmful pathogens from the mixture.
You will still need to include compost by itself in the soil mix. So dedicate one pile to worms and one pile purely for mixing into the soil when you're ready to start growing.
MAKING ORGANIC SOIL FOR WORLD-CLASS CANNABIS

Now that you have a high-quality compost—and maybe some worm castings—it is time to use it as the base for a top-quality organic growing medium.
This soil recipe is a variation of the recipe made famous by Subcool, the original weed nerd. At the end of the recipe, there are other recommended amendments if your budget allows for enhanced performance. The basic recipe will be more than enough for excellent cannabis performance, but the little extras can increase performance and plant resilience further.
What you will need:
• 100kg compost base
• 25kg worm castings
• 250g azomite (or similar volcanic mineral soil product)
• 150g Epsom salts
• 100g mycorrhizae
• 1kg bat guano
• 250g dolomite
• 25g powdered humic acid
• 1kg blood meal
• 1kg bone meal
• 500g rock phosphate
• Tarp or kiddie pool
• Shovel or spade
• Large bins for fermentation—rubbish bins, wheelie bins, etc.
After fermentation:
• Coco coir
• Aeration mix—perlite or pumice
This recipe is entirely scalable, so you might need to do a bit of math if you want to go bigger or smaller.
INSTRUCTIONS

1. Put a third of the base compost mix and a third of the worm castings onto your mixing surface.
2. Add the azomite, Epsom salts, dolomite, humic acid, and mycorrhizae. Mix well.
3. Add another third of the base mix. Mix well.
4. Add the bone meal and blood meal. Mix well.
5. Add the rest of the base mix.
6. Add the bat guano and rock phosphate. Give it a final mix to ensure everything is distributed evenly.
7. Place the mixture into the fermentation bins and add 10 litres of water for every 70 litres of mixture. Seal tightly and leave in a warm place or even in the direct sun for at least 30 days. This will promote the development of beneficial microorganisms. You are now ready to grow.
8. This is a very hot mix. When it is ready to use, mix it with equal parts expanded coco coir and aeration mix. This will prevent burning of young plants and support an aerated and permeable soil mixture that feeds plants and promotes ideal water movement and air penetration.
For added performance, consider these additions to the soil mix if budget allows:
• Neem cake: provides fertilisation and pathogen resistance
• Alfalfa meal: unbeatable source of nitrogen and trace elements
• Clover meal: excellent source of nitrogen and trace elements
• Volcanic rock dust: promotes microbial activity; rich source of minerals
• Crustacean and mollusc shell flour: rich source of calcium
• Kelp and seaweed meal: minerals, nutrients, and hormones
• Palagonite: provides cation exchange and stops nutrient leaching
• Silica rock dust: binds to heavy metals and promotes nutrient uptake and healthy cell division while deterring pests
• Zeolite: absorbs, holds, and releases nutrients according to need; improves cation exchange
• Malted barley: has enzymes that promote microbial activity
• Fermented aloe vera: contains the growth hormone salicylic acid and boosts enzymatic and microbial activity
GERMINATING SEEDS
Germinating cannabis seeds organically is no different than doing so with any other method. When seeds are exposed to moisture, they are triggered to begin growing. They have enough nutrients within the shell to produce a root, cotyledons, and the first true leaves before requiring food from their environment. Germinating outside the grow medium is simply a way to ensure seed viability.
The three most often used germination techniques for growing cannabis are: straight into the growing medium, soaking in water, or the paper towel method.
Directly into the growing medium
There are a couple of variables to consider when planting straight into soil. Some growers prefer to plant into smaller containers, then pot on as the plants get larger. Others prefer to plant straight into a large container where the plants will spend their whole lives. Use a seed-raising mix in smaller containers, or make a small cell of seed-raising mix in the centre of a large container filled with organic soil. This prevents young plants from nutrient burn and gives them some time to develop before striking the nutrient-rich medium.
1. Dampen, but don’t wet, the area where the seed is to be placed.
2. Make a small hole as deep as the second joint on a finger.
3. Place a pinch of mycorrhizae into the hole, then cover with soil to make the hole 1cm deep.
4. Place the seed into the hole and lightly cover with damp soil.
5. An infant plant will emerge 3–7 days later and begin growing.
Water soak method
1. Place seeds in a glass of shallow water.
2. Within 36–48 hours, the seed will split and the tip of the taproot will appear. Don’t leave
seeds in water for longer than 48 hours as they can drown.
3. Follow the same steps as for planting straight into soil once the seeds have proven to be viable.
Paper towel method
1. Cover a plate with paper towel and dampen, but do not saturate.
2. Place seeds on the moistened towel and cover with another piece of moist paper towel.
3. Cover the plate with another plate, or put inside a plastic bag, and put in a dark, warm place.
4. Check every 24 hours.
5. Once seeds have sprouted and the taproot has emerged, follow the same steps as for planting straight into the soil.
When not planting directly into soil, and if the taproot emerges quickly and grows too long, or even if the cotyledons have shed the seed shell, care will need to be taken. Without touching the root, deepen the hole and place the root in vertically; back-fill while holding the emerging plant upright. If cotyledons have appeared—they will be yellow as they have had no chance to photosynthesise—be gentle as they can break easily. They will become green in 24 hours and growth will continue. Such infant plants are slower to begin vegetation, but will still become healthy plants as only a few days grow time is lost.
If the taproot has only just cracked the seed husk, simply dropping them into the hole will suffice. The seed will automatically rotate in the soil to direct roots down and new growth towards the light. Plants rarely grow in the wrong direction.
CARING FOR YOUNG PLANTS

It is easy to overwater young plants, especially when planting directly into a large container. Infant plants will get enough water if misted with a spray bottle. When misting plants, give a few squirts near the base of the seedling; this will be enough moisture for early growth.
Alternatively, use an eye dropper or pipette to control the amount of water going to the root zone. Apply water in a ring the diameter of the emerging leaves, adding more each session as the plant gets larger. It is better to not water at the stem directly to help encourage lateral root expansion.
• Indoors: Keep young plants warm and well humidified. Commercial seed-raising trays that have a clear, domed lid—or a clear plastic bottle cut in half and placed over each individual plant—provide ideal conditions for infant plants. Begin early growth under fluorescent lights for the first 1–3 weeks or until the first row of 7-fingered leaves appear, then move them to the larger containers filled with the grow mix under higher wattage grow lights.
• Outdoors: Keep young plants out of direct sunlight by providing some shade. This can be in a shade house, under a temporary sheet of shade cloth, or in dappled light under a tree. When plants have grown their first row of 7-fingered leaves, transplant into the final growing location. Sprinkle a teaspoon of mycorrhizae into a prepared hole before transplanting, then water in.
Once plants have clearly begun growing well, it is time to give them their first beneficial inoculation. Depending on brand, this will primarily be trichoderma, mycorrhizae, lactobacillus, and other beneficial bacteria and fungi. These organisms form a symbiotic relationship with the roots, and increase overall plant performance significantly.
VEGETATION
Once plants are well established, they will develop a taste for the organic soil mixture you have made and go into overdrive. Cannabis is a rapid-growing annual that vegetates very quickly with high nutrient demands. The homemade super soil will supply enough nutrients for early growth before needing amendments for flowering.
• Indoors: Vegetation time is unlikely to be more than 4 weeks. The nutrient-rich organic soil mix will not need amending until day 45–60 of the overall grow time.
• Outdoors: Vegetation time is significantly longer, generally 3–5 months, and plants get much larger, requiring amendment supplementation once over a 3-month vegetation time and twice over a 5-month vegetation time.
Often used amendments during vegetation outdoors:
• Composted chicken manure
• Bat guano
• Alfalfa meal
• Worm castings
• Malted barley
• Combination of rock dusts
• Silica powder
• Standard compost
PLANT CARE DURING VEGETATION
• Water regularly, while respecting the wet-dry cycle. Indoors, if the medium is dry when a finger is pushed in to the second joint, it is time to water. For plants growing outdoors in garden beds, use a water meter to accurately determine moisture content.
• Once every two weeks, water with chosen fungal and bacterial inoculant.
• Once every two weeks, foliar spray with a natural pesticide like neem oil.
• Water once per week with diluted compost tea or enzyme-rich fluids like fermented aloe vera or malted grain extracts.
PRE-FLOWERING AND FLOWERING
The flowering process requires less nitrogen-rich amendments and more phosphorus and potassium. Ideal sources are:
• Bat guano
• Potash
• Kelp meal
• Rock phosphate
• Greensand (mined from prehistoric fossilised sea beds)
• Indoors: Add two tablespoons of mixed amendments at day 45–60, depending on the requirements of the species being grown. Then again halfway through flowering.
• Outdoors: 50-litre containers should be given a cup of mixed amendments under the mulch and watered in during pre-flower, then again halfway through flowering. Large plants unrestrained in garden beds will take 10–20 litres per plant, evenly spread over the whole bed.
Adding more compost and worm castings in all growing situations also maintains soil friability and necessary nutrients.
HOW TO MAKE COMPOST TEA AND ENZYME-RICH DRENCHES
Compost tea
1. Fill a 20-litre container with dechlorinated water. The easiest way to dechlorinate water is to let it sit exposed to the air for 24 hours.
2. Put 2 cups of compost into a permeable bag and suspend in the water-filled bucket.
3. Using an air stone, let air bubble through the water for 24–36 hours.
4. Once prepared, dilute 1 part tea to 15 parts water.
5. Use immediately. Do not use after more than six hours; it will not keep and can become toxic.
Enzyme drenches
A number of beneficial enzyme-rich drenches can be made at home. The following can be done with minced fresh aloe leaves, malted barley, or malted corn.
1. To malt barley or corn, soak one cup in water until the seed tail appears—or source pre-malted barley, which won’t need to be soaked.
2. Drain and let dry out completely.
3. Use a blender to pulverise the grain into a powder.
4. Put the powder in a 20-litre container of dechlorinated water.
5. Using the air stone again, bubble the mix for 24 hours.
6. Strain the mixture, then apply directly to the soil.
The method is the same for aloe vera, only you must pulverise a few fresh leaves and add the slurry to the water for bubbling.
BENEFICIAL FOLIAR APPLICATIONS
There are a number of foliar applications that can be safely applied during the vegetative phase. Stagger the timing so that growth enhancers like dilute compost tea, aloe vera, or seaweed and fish emulsions are sprayed one week, with neem being sprayed the next.
ORGANIC IS GOOD, SO GIVE IT A TRY!
Getting the hang of organic growing is easy, but it does take a little practice. You will be thrilled with the results while plants are growing, and the difference in quality is obvious once consumed. Harvests may be a little smaller than with pure hydro chemical salt grows, but the quality far outweighs the small difference in end yield.


